Before you start, make sure these are set up in your account first. If any is missing, the tenant form won’t let you proceed.
Step 1: Create a Project
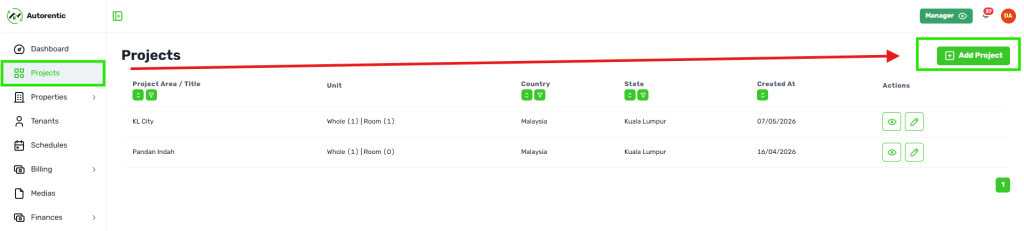
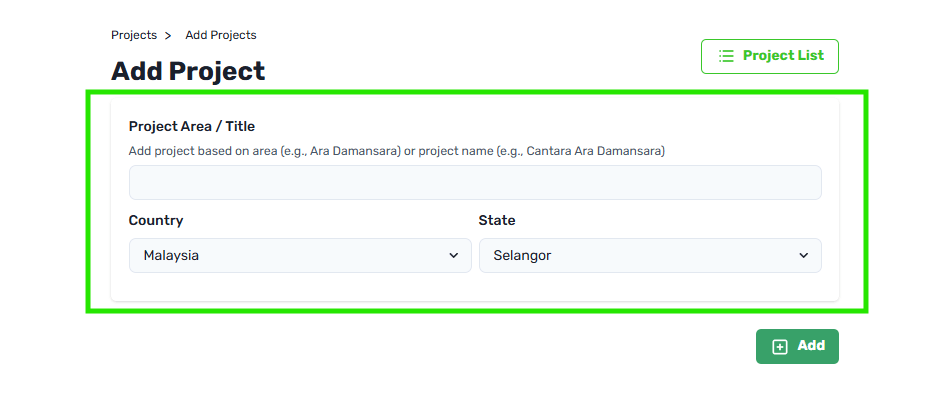
Go to sidebar Projects and click “Add Project”. A project groups your properties (e.g., “Bandar Cassia”, “Setia Alam”).
Important notes:
A Project represents a building, block, or development, such as an apartment block or a condo tower. By grouping your units under a Project, you can easily manage a large portfolio within the same location without having to re-enter address and location details for every unit.
Step 2: Create a Property
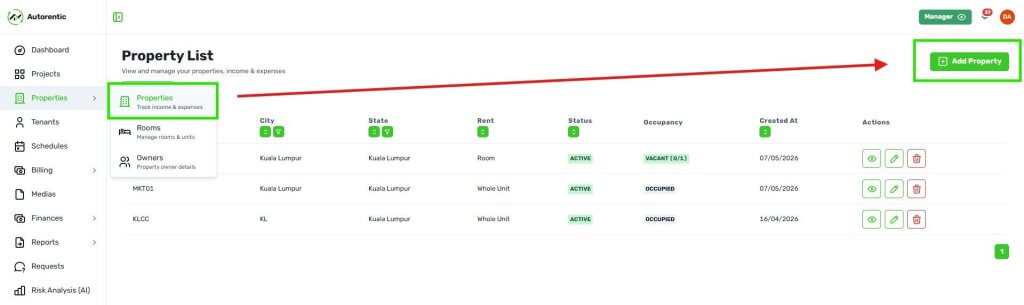
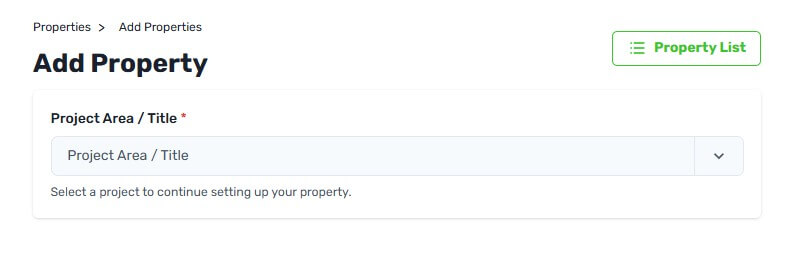
Go to Properties and click “Add Property”. Select the project, fill in address, rental rate, and deposit amounts. These will auto-fill into the tenant’s invoice later.
Important notes:
Each Property you add under a Project represents an individual unit (e.g., Unit 12-3A). A property can be configured as a whole unit rental or subdivided into rooms for individual tenants.
Whole Unit — the entire unit is rented to a single tenant (e.g., a studio, a 2-bedroom apartment).
Room-based — the unit is subdivided into individual rooms, each rented to a different tenant. You will need to create the rooms under this property before adding tenants.
Once the above are in place, you’re ready to proceed
Step 3: Create Tenant
Go to sidebar Tenants and click “Add Tenant”. Select the Project and Property you just created, then fill in the tenant’s details from there.
Step 4: Fill in Tenant Details
Important notes:
Invoice Date: It controls when your first invoice is generated.
– More than 30 days away: No invoice is created yet. It will be generated automatically 1 month before the due date. – 7 to 30 days away: A draft invoice is created immediately and visible in Property Manager Invoices list. – Within 7 days: A finalised invoice is created immediately.
Deposit amounts: They are pulled automatically from your Property settings.
Invoice Type: One that includes deposits (as configured in the Property settings) alongside rental fees, and one that covers rental fees only.
Step 5: Pending Tenant to accept
Tenant will receive notification once you pressed ‘Add’ button to either accept your invitation or decline it.
– If the tenant accepts: The contract status will be updated to Accepted, and the property manager will be notified accordingly. – If the tenant declines: All pending invoices will be cancelled, the contract status will be updated to Rejected, and the property
manager will be notified accordingly.